

Correct installation of a bed barrier is one of the essential steps that directly affects a child’s safety during sleep. Even a high-quality barrier can lose its function if installed incorrectly. That is why it is important to pay maximum attention to assembly and follow the manufacturer’s exact instructions.
The Popular model is especially popular thanks to its combination of simple construction, stable attachment, and installation on the bed slats, which it does not require any drilling or screwing into the bed slats. Thanks to this solution, installation is quick, clean, and suitable even for users who do not want to interfere with the bed structure.
In the following guide, we will look at how to correctly install the Popular barrier step by stepwhat to watch out for when using it, and how to ensure it continues to fulfill its safety function over the long term without compromise.
Video guide: Assembly step by step
Watch the step-by-step video guide for assembling the bed barrier here.
Brief summary: What you will see in the video
- unpacking all parts of the barrier and checking the accessories
- assembling the basic structure and connecting the individual parts
- inserting the protective mesh into the barrier frame
- correct positioning of the barrier on the bed
- attachment to the bed slats without drilling and final stability securing
The step-by-step video shows the entire assembly process so that even a complete beginner can manage it
and also points out the correct procedures for safe and secure attachment of the barrier.
Assembly procedure for those who prefer to read

Preparation:
First check the contents of the package—the lower and upper rods, side panels, protective mesh, and hardware. Make sure you have all the parts and nothing is missing. At the same time, inspect the individual components to ensure they are not damaged, for example by transport.
Barrier assembly:
The barrier consists of four rods (the 80 and 90 cm sizes have only two rods), specifically two upper and two lower ones. The rods need to snap together correctly—one end is finished with a ball and the other with a hole, with the ball on one rod fitting into the hole on the other. At the opposite ends are balls designed to snap into the barrier’s side panels. All the balls must face the same direction so that the structure can be assembled correctly.
Then insert the rods into the protective cover and click the entire frame into the side panels of the barrier. Pull the cover through the side panels and fasten the zipper. Then insert the metal “L” brackets into the side panels and secure them with the supplied screws. Next, snap both plastic tabs onto these metal “L” brackets, with the grooved side facing upward. This completes the barrier frame, which is correctly assembled and ready to be installed on the bed.
Installation on the bed:
Remove the mattress from the bed. Attach the safety strap to the plastic tabs. Grasp the rail and place it in the bed frame directly on the slats. Then secure the rail to the bed frame or the slats using the safety strap. After that, you can put the mattress back on the bed - its weight will help firmly fix the rail and ensure its stability.
Using two or more rails on one bed:
The procedure is similar to that for a single rail. As an example, we will show how to connect two rails into a L. First place both rails on the bed slats. At the point where the two rails will connect, remove the supporting metal "L" bracket from one of them. Which "L" you remove is up to you - it depends on how the rails fit best on the bed slats. Then connect the rails using the two connecting connectors (included in the package) and secure each one with the two screws provided. Finally, fasten the rails with the safety straps and weigh them down with the mattress. The assembly is then ready for safe use.
Safety check before first use

The 7-centimetre rule:
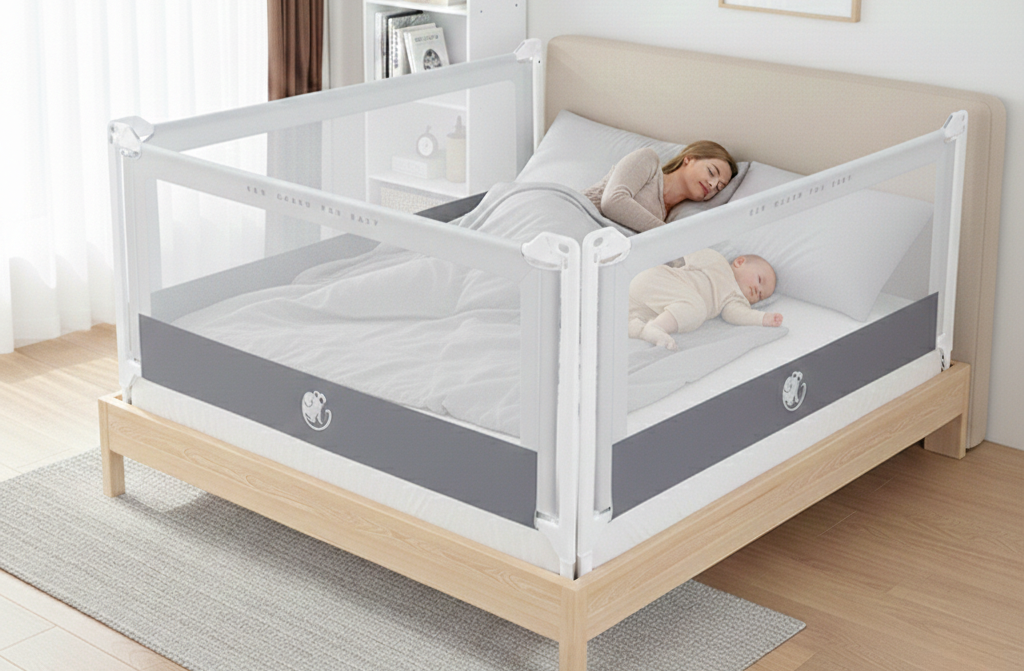
Always adjust the height of the rail according to the lower rail bar and the height of your mattress. The lower bar must be at least 7 centimetres below the mattress level. This distance is important so that the child cannot insert a foot or hand into the gap between the rail and the mattress.
Stability test:
The rail must hold firmly on the bed. It must not slide, come out of the bed, or tilt or twist the structure. The rail must be positioned straight and at the same height along its entire length.
Mechanism check:
Before first use, test the locking mechanism and make sure the rail closes properly and holds securely in the closed position.
Common installation mistakes (What should you watch out for?)

Reverse installation:
The side locks must always face outward from the bed. Also make sure the plastic tabs are installed correctly.
Gap between the mattress and the lower rail bar:
A gap that is too large between the mattress and the lower rail bar presents a risk of the child's limb getting trapped.
Incorrect rail height setting:
The rail is set at a different height on each side, which can cause it to tilt or reduce stability.
Bed rail placed on the bed frame:
This problem usually arises when the barrier size is chosen incorrectly, meaning the barrier does not fit into the inner space of the bed and rests against the frame instead of the slats.
Connectors:
Insufficiently tightened connectors can cause the barriers to loosen or move. The side parts must be properly aligned before and after tightening the connectors - that means the gap between the side parts must be the same along the entire length.
Safety straps:
Overly tightened safety straps can lead to deformation of the barrier structure.
Supporting "L" not removed when assembling two or more barriers:
When connecting at least two barriers, it is necessary to remove the supporting "L" from one of them. If two "L"s remain placed on top of each other, the barriers will not sit properly on the slats.
Swapping the poles:
Make sure not to confuse the poles, so that the upper poles are not placed in the lower part of the barrier and the lower poles in the upper part. The upper poles always have the protective foam stretched over them, which makes them easy to recognize.
Regular maintenance and follow-up inspection

Checking the joints:
We recommend checking from time to time whether all joints are still firm and properly tightened. If necessary, tighten them again to maintain the barrier's stability and safety.
Cleaning:
The barrier structure can be wiped with a damp cloth. The barrier cover can only be washed by hand, or in a washing machine if it has a hand-wash program. The washing label with exact instructions is located directly on the cover.
FAQ – Frequently asked questions about the Popular model
Do I have to drill the barrier?
No. Installation is completely without drilling into the bed frame.
What should I do if I have leftover space in the corner of the bed?
Some customers choose shorter barriers, for example because they have a nightstand next to the bed and want to keep access to it. If you purchased a shorter barrier and it does not suit you, you normally have 14 days to return it and the option to order the correct size.
Can the barrier be folded down when getting up?
No. The barrier is not foldable. Opening and closing works by means of a sliding and retracting mechanism.
Can I connect multiple barriers?
Yes, but always only barriers of the same type. They can be joined into a L, U or around the entire bed.
Is it also suitable for a toddler?
Yes. The barrier is suitable from infancy and also provides protection for older and more active children.
Conclusion:
If needed, you can contact us anytime. We’ll be happy to help you with installation, choosing the correct size, or solving any question.
Write to us by email informace@monkeymum.com or contact us at WhatsApp +420 725 441 733.
Write a comment
This site is protected by hCaptcha and the hCaptcha Privacy Policy and Terms of Service apply.